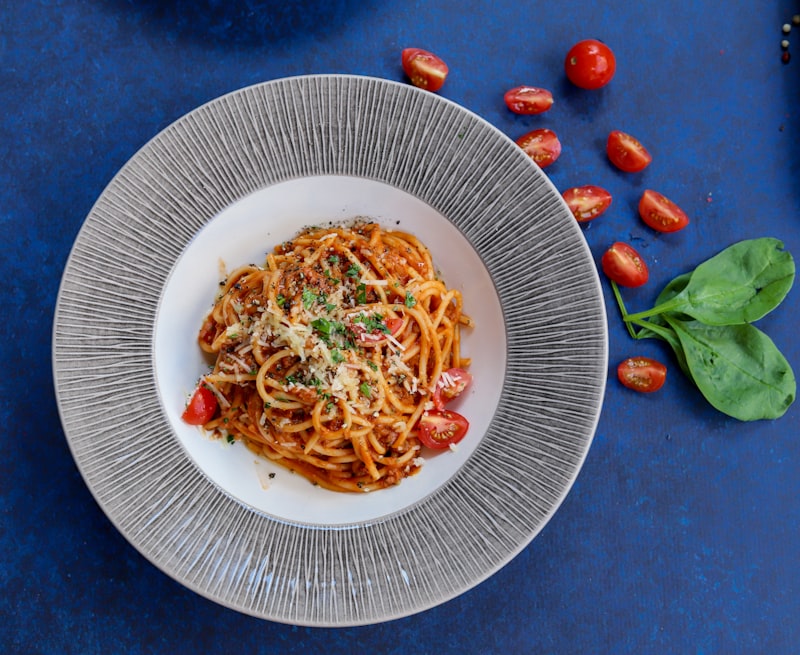
Making Egg Dough Pastas – a delicious recipe with flour, WET, egg yolks, extra-virgin olive oil, water, pasta. Easy to follow and perfect for any occasion.
-
1
Measure the flour and shake it through a sieve into a medium-size mixing bowl (sifting aerates the flour).
-
2
However, if you are making a mixed-flour pasta, dont try to sift; just stir or whisk the flours to blend them.
-
3
Following the illustrations, drop the eggs and/or egg yolks (in the specified amounts) into a small bowl or measuring cup; beat briefly with a fork to break them up.
-
4
Pour in the measured amounts of oil and water and mix well with the eggs.
-
5
(In a measuring cup, you should have 7 fluid ounces.)
-
6
Pour the wet ingredients into the flour.
-
7
Toss and mix everything with a fork until all the flour is moistened and starts to clump together.
-
8
Lightly flour your hands, then gather the clumpsor use a flexible plastic dough-scraperand begin kneading right in the bowl, folding the raggedy mass over, pushing and turning it, then folding again.
-
9
Use the kneading action to clean the sides of the bowl.
-
10
When youve formed a cohesive clump of dough, turn it out onto a small work surface lightly dusted with 1/2 teaspoon flour and continue kneading for 2 to 3 minutes, until the dough is smooth and shiny on the outside, soft throughout (no lumps), and stretchy.
-
11
If your dough seems too sticky or too hard after it has been kneaded for a minute or two, adjust the consistency with very small amounts of flour or water and see box, page 157.
-
12
If you are adding nuts to a dough, do it when you turn the dough out of the bowl (see page 172).
-
13
Form the dough into a disk, wrap it tightly in plastic wrap, and let it rest at room temperature for 1/2 hour.
-
14
Store, very well wrapped, in the refrigerator for a day; or for a month or more in the freezer.
-
15
Defrost frozen dough slowly in the refrigerator, and let it return to room temperature before rolling.
-
16
Defrosted dough will need a bit more flour.
-
17
Fit the regular steel cutting blade in the bowl of the processor (these a batches are too small for the dough blades of most machines).
-
18
Measure the flour or different flours into the bowl; process for a few seconds to blend and aerate.
-
19
Drop the eggs and/or egg yolks (in the specified amounts) into a spouted measuring cup or a small bowl; beat briefly with a fork to break them up.
-
20
Mix in the measured amounts of oil and water (you should have 7 fluid ounces).
-
21
To minimize the chance of overheating the dough, use eggs right from the refrigerator and cold water.
-
22
Start the machine running with the feed tube open.
-
23
Pour the wet mixture into the bowl quickly; scrape all the egg drippings out of the cup into the processor too.
-
24
Let the machine run for about 1/2 minute.
-
25
A dough should form quickly; most of it should clump or ball up on the bladesome may spread on the sides of the bowlwhere it will twist and knead.
-
26
Let the machine knead the dough for about 10 seconds (no more than 40 seconds total processing).
-
27
Turn the dough out onto a very lightly floured surface, and knead by hand for another 1/2 minute or so, until its smooth, soft, and stretchy.
-
28
Wrap and rest the dough, or store it as described for making the dough by hand.
-
29
If you have problems in the food processorif theres no apparent clumping after 30 seconds, or the dough stiffens up very quicklystop the machine and feel the dough.
-
30
Adjust for stickiness or dryness by working in either flour or water in small amounts (see box, page 157).
-
31
You can continue to work the dough in the machine, but dont process for more than a total of 40 secondsor turn the dough out to correct the consistency and finish kneading by hand.
-
32
stop the machine and feel the dough.
-
33
Adjust for stickiness or dryness by working in either flour or water in small amounts (see box, page 157).
-
34
You can continue to work the dough in the machine, but dont process for more than a total of 40 secondsor turn the dough out to correct the consistency and finish kneading by hand.
-
35
When I make pasta at home, I rarely take out my pasta machine to roll out the dough.
-
36
Even though Ive got a great machine (with a motor!
-
37
), I find that its still faster to cover the counter with a big wooden board, grab the thick wooden dowel I use as a pin, and start rolling.
-
38
For most people, though, I think a sturdy pasta machine is an important, even essential, kitchen tool.
-
39
(Im referring to the kind of machine with rollersnot the home pasta extruders.)
-
40
The machine itself is simple to operate; the part that takes practice and attention is handling the dough, as I detail below.
-
41
Once you get the feel of it, you can use your machine to develop your dough and then stretch it into thin and tender pasta quite quickly.
-
42
So, if you dont have a machine, try to get oneand if you do, keep it readily available (not on the top shelf of a cupboard!)
-
43
and use it often.
-
44
Have your dough at room temperature for rolling.
-
45
Cut 1 pound of dough into four pieces.
-
46
Work with one piece and keep the others covered.
-
47
Have a large tray or baking sheet nearby (or two if you have them) lightly sprinkled with flour, on which to lay thin dough strips.
-
48
Smooth kitchen towels are also useful as resting surfaces and to separate layers of strips.
-
49
Have flour for sprinkling and a knife or sharp pastry cutter handy too.
-
50
Turn the knob to the widest settingyoull work at this setting for a while.
-
51
Following the photographs press the first piece of dough with your hands into a circle or a small rectangle, then fold it in half, and roll it through the machine two times.
-
52
Fold the now elongated rectangle in thirds, turn the dough 90 degrees (so the fold is on the side), and roll it through.
-
53
Catch the dough; fold it and roll it through again with the fold on the side.
-
54
Repeat the folding and rolling six more times (total of eight) to strengthen and smooth the dough.
-
55
Like kneading, this will make it more resilient and workable.
-
56
Lay the first piece down, sprinkle it with a tiny bit of flour on both sides, and cover it (with plastic wrap or a towel).
-
57
Put the remaining pieces of dough through the same steps of rolling and folding.
-
58
Either reset the rollers to the very next setting (slightly narrower) or skip to the third (even narrower)I generally roll dough at every other setting, from wide to narrow.
-
59
Roll your first strip through, short end in first (dont fold it again).
-
60
Let the rollers grab and move the doughdont push it or pull it throughand catch it in your hand as it comes out.
-
61
Roll the strip again to stretch and widen it; lay the strip down (on the lightly floured tray) and stretch the others in the same way.
-
62
Reset the machine even narrower; you should be on the third or fifth setting by now.
-
63
Pass the first strip through once; it will lengthen rapidly, and you will need to catch and support it as it comes through the rollers.
-
64
Flour the strip lightly if it is sticking to the rollers.
-
65
After the second pass, if the strip is 20 inches or longer, cut it crosswise in half, to get two shorter strips.
-
66
Lay these down (not overlapping) and dust with flour; roll and cut the other strips in the same way.
-
67
You should have eight long strips at this point, each about 5 inches wide (nearly the width of the rollers).
-
68
Because some doughs stretch more readily than others, the strips may be thin enough.
-
69
If they are over 15 inches in length and you can nearly see through the dough, you can stop rollingif you want to.
-
70
But if the pasta is 1/8 inch thick (and the strips are shorter than 15 inches), you should pass them through the next-narrower setting.
-
71
Roll the dough as thin as you like, as long as it doesnt tear or fall apart.
-
72
If it does tear, fold the strip in half or thirds (making it shorter and enclosing the tear) and reroll at wider settings.
-
73
Set the finished strips down, lightly floured and not overlapping, in the big trays.
-
74
If necessary, cover a layer of strips with a floured kitchen towel, and rest more strips on top.
-
75
Have your dough at room temperature for rolling.
-
76
Cut 1 pound of dough into three pieces (5 to 6 ounces each).
-
77
Work with one piece and keep the others covered.
-
78
Have flour close at hand for sprinkling when needed.
-
79
Lightly flour the work surfacepreferably woodand rub a little on your rolling pin.
-
80
Press the first piece of dough flat, then dimple it all over with your fingertips.
-
81
Begin rolling it into a rectangle, about twice as long as it is wide.
-
82
Working from the center of the dough, roll up and down, left and right.
-
83
Occasionally, flip the dough over and dust the surface with flour if the dough is sticking; periodically, turn the dough 90 degrees.
-
84
When the dough gets thin and floppy, you can also stretch it gently with your hands: grasp the edges and tug the dough on all sides to widen and lengthen it, evenly.
-
85
Roll and stretch the dough until it is 20 to 24 inches on the long sides and about 10 inches on the short sides.
-
86
Hand-cut this sheet of dough into your chosen shape, as detailed below, before rolling out the next piece.
-
87
As soon as you have rolled all your dough pieces through the pasta machine or hand-rolled one piece, you can start cutting the shapes you want.
-
88
Long flat shapes like tagliatelle (the same as fettuccine), tagliolini, or pappardelle are the quickest to cut (and cook).
-
89
A machine attachment will cut tagliatelle or tagliolini precisely, but I like hand-cutting and the slightly irregular noodles I get.
-
90
Details on both methods follow.
-
91
Lacce (shoelaces) are hand-cut thicker strips (shorter than the others) that are also quick to produce and a good shape for doughs that dont roll very thin.
-
92
If you are not in a rush, however, try the other shapes shown here: Maltagliatiwhich means badly cutare small diamond-shaped pieces (or rhomboids, in geometry).
-
93
Garganelli are little quill-shaped tubes rolled from maltagliati.
-
94
I especially love the last shape, boccoli, a spiral that resembles a little girls ringlets (boccolo is Italian for a curl).
-
95
All three are made from long ribbons of dough, so you can easily make some of each from the same batch.
-
96
Get someone to share the fun!
-
97
You can cook all these shapes as soon as they are cut, or let them sit and dry at room temperature until you are ready, but use them within a day.
-
98
Lay them out on trays as shown in the photos, lightly floured and separated so they dont stick togetherarrange long shapes in separate small nests, and other shapes in a single layer.
-
99
Pasta that has air-dried will take a bit longer to cook.
-
100
To freeze cut pasta for long storage, set the nests or individual pieces in single layers, floured and separated, on trays that fit into your freezer.
-
101
After theyre solidly frozen, pack them in small airtight plastic bags or containers.
-
102
Dont defrost before cooking; simply drop the frozen pieces into the boiling water.
-
103
For 1 pound of pasta, bring 6 quarts of water to a full boil and stir in 1 tablespoon kosher or sea salt.
-
104
The dough has no salt, so it is particularly important that the cooking water be well salted.
-
105
Before adding the pasta to the water, shake off excess flour, using a strainer or colander or just shaking it in your hands.
-
106
Drop the pasta into the boiling water in several batches, stirring with each addition to separate the pieces.
-
107
Keep the heat high but dont cover the pot.
-
108
Let the water return to the boil, stirring occasionally.
-
109
Start timing when the boil resumes.
-
110
Cook at the boil at least until the pasta rises to the top; at that point, many pastas are done (but some are not).
-
111
Remove and taste a bit of pasta when it surfaces.
-
112
Cooking times will vary with the composition of the dough, the shape and thinness of the pasta, and the degree to which it dried before cooking.
-
113
Here are some general guides to cooking times:
-
114
Fresh pastas are not cooked al dente like dried pastas.
-
115
Cook them until they are tender all the way through and you have tested them.
-
116
Tender white-flour pastas will cook the quickest.
-
117
Rich Mans Golden Pasta (see above) will be done in as little as 2 minutes.
-
118
Poor Mans Two-Egg Pasta (see above) will take a bit longer.
-
119
Some mixed-flour pastas, like flaxseed and potato pasta, cook quite fast.
-
120
Heavier, whole-grain pastas, like whole wheat, take considerably longerabout double the time.
-
121
Flat long pasta cuts will cook more quickly than rolled shapes like garganelli or boccoli.
-
122
Remove pasta from the cooking pot with a spider, tongs, or other tool, let excess water drain into the pot, and drop with clinging water into a skillet containing the sauce.
-
123
Finish the pasta and sauce together following the procedures outlined on page 105.
-
124
The Rolls-Royce of noodles!
-
125
It tastes rich (and it is rich) yet has such a delicate texture it melts in the mouth and hardly seems filling at all.
-
126
For all its tenderness, the dough is resilient and easy to work, but it cooks very quickly.
-
127
Suggested Shapes and Sauces
-
128
This pasta should always be the star of the show: cut it in long flat shapes, either tagliatelle or pappardelle.
-
129
It will not take much dressing, since it has lots of flavor.
-
130
Dress simply with butter and cheese (page 119), and top with a shaved truffle if you have one.
-
131
Or serve it with the juice of roast meat or poultry.
-
132
One traditional way is to dress it with Bolognese sauce topped with grated Parmigiano-Reggiano or Grana Padano.
-
133
Long-cooked savory sauces, such as guazzetto, make this a truly festive dish.
-
134
But just remember not to oversauce and smother the pasta.
-
135
You will sense the difference in your mouth: this pasta has a bit more substance to the bite than the all-yolk pasta.
-
136
Still, it is quite tender and rich.
-
137
Suggested Shapes and Sauces
-
138
Another pasta to savor in simple flat cutstagliatelle, tagliolini, or pappardelle.
-
139
Sauce with Marinara (page 130); also good with longcooking meat or vegetable sauces like Ragu alla Bolognese (page 143), either of the guazzetti (pages 151, 154), or Asparagus, Green Pea, and Scallion Sauce (page 135).
-
140
Cheese sauces and game sauces are also good with this pasta.
-
141
Firmer than the preceding two, yet flavorful and light, this is a versatile pasta that serves as an excellent carrier for all flavorful sauces.
-
142
It is the pasta I recommend for ravioli and lasagna.
-
143
Cut this pasta in any shape you like; sauce it with almost anything.
-
144
Since it is not as rich as the first two, it goes very well with fish and vegetable sauces.
-
145
Heres a specific recommendation: practice making boccoli (Shirley Temple curls) with this pasta and dress with Simple Tomato Sauce (page 132), or with vegetable and pesto sauces.
* Per serving · 4 servings · Values may vary.
No additional tips available.
No specific allergen information. Please check the ingredient list for possible allergens.
How did you like this recipe?
Frequently Asked Questions
This recipe makes 4 servings. You can adjust the portion size directly on this page.
You need 21 ingredients. The key ingredients include: DRY, 2 cups all-purpose flour, WET, 9 egg yolks from large eggs (2/3 cup), and more.
Yes, Making Egg Dough Pastas falls under the Pasta & Noodles category and is a great choice for this type of meal.
Store leftovers in an airtight container in the refrigerator for up to 3–4 days. Reheat gently before serving.