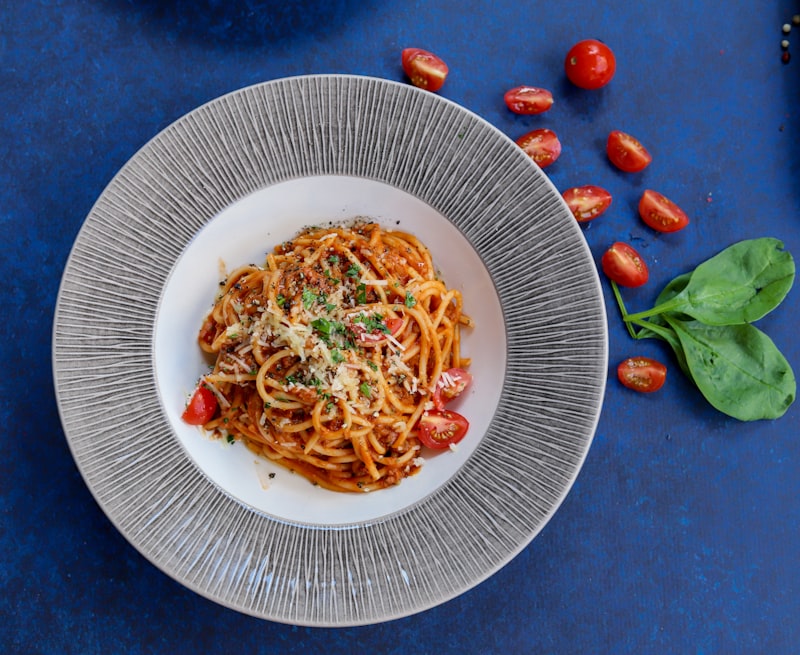
Try this homemade Fresh Egg Pasta recipe the whole family will love. Made with flour and eggs. Easy step-by-step instructions included.
This Fresh Egg Pasta is built around simple, easy-to-find ingredients. It comes together quickly and makes 4 servings, at about 107 kcal each. The step-by-step instructions below are written to be easy to follow, even on a busy day.
It's versatile enough for an easy weeknight dinner yet satisfying enough for guests at the weekend. Serve it with your favorite sides, and keep any leftovers for a quick meal the next day.
Updated Jun 30, 2026
-
1
To make the dough: Put the 2 1/2 cups flour on a large work surface.
-
2
Make a well in the center large enough to contain the eggs.
-
3
Make sure your flour walls are high enough to keep the eggs from escaping.
-
4
Pour the eggs into the well.
-
5
With a fork, begin drawing in flour from the sides and whisking it with the eggs.
-
6
Take care not to let the runny eggs breach the flour walls or you will have a mess.
-
7
As you incorporate more flour and the egg mixture thickens, you can relax about the walls.
-
8
When the dough becomes too stiff to mix with the fork, continue with your hands.
-
9
You wont be able to incorporate all the flour, at least not at first, but use enough to make a dough you can knead without it sticking to your hands.
-
10
Sift the remaining flour to remove any coarse particles, and wash your hands to remove any caked-on bits.
-
11
Now knead by hand for several minutes, adding as much reserved flour as you need to make a smooth dough without a trace of stickiness.
-
12
Shape the dough into a rectangle and divide it in half.
-
13
Set aside one-half, covered with a clean dish towel.
-
14
Now you will make pasta sheets with the other half, using the pasta machine.
-
15
Lightly flour the work surface.
-
16
Firmly clamp your pasta machine to an immovable surface.
-
17
Set the rollers on the widest setting.
-
18
With a rolling pin, flatten the dough into a rectangle thin enough to go through the rollers.
-
19
Feed it through one time.
-
20
Lay the resulting ribbon on your lightly floured work surface, then fold it in thirds, matching edges to make a neat rectangle.
-
21
With the rolling pin, roll it out in the other direction (with the open ends at the top and bottom), flouring as necessary to keep it from sticking.
-
22
Try to keep the open ends matched up so you continue to have a neat rectangle.
-
23
With the roller still on the widest setting, repeat the process at least nine times: feeding the dough through, folding the ribbon in thirds, then flouring and flattening.
-
24
With each successive trip through the rollers, you should need less flour.
-
25
At the end of this mechanical kneading, you should have a smooth, silky, well-blended ribbon of dough.
-
26
If not, continue the process until you do.
-
27
To stretch the dough: Now you are ready to begin the stretching process by feeding the ribbon through progressively narrower settings, beginning again with the widest one.
-
28
Cut the ribbon into manageable lengths whenever it gets too unwieldy.
-
29
Resist flouring the dough at this point because the flour wont be well incorporated; dust lightly with flour only if the dough threatens to stick to the rollers.
-
30
I find that setting number 5 on the KitchenAid attachment is thin enough for fettuccine, which should be delicate but not insubstantial.
-
31
The noodles should be neither so thick that they are chewy, nor so thin that they clump after cooking.
-
32
Pasta for lasagne and cannelloni should be thinner; I use setting number Pasta for ravioli should be as thin as you can comfortably make it; I use setting number You will need to find the settings you prefer on your own machine, which may take a few attempts.
-
33
As you finish stretching each sheet, lay it on a clean dish towel to rest.
-
34
While you wait for the first batch of sheets to dry, repeat the mechanical kneading and stretching process with the second half of the dough.
-
35
To cut the noodles (see also Notes): Depending on how much flour you worked into the dough, the sheets may be ready to cut immediately or they may need to dry awhile.
-
36
If they feel at all damp, the noodles will stick together when you cut them.
-
37
Let the sheets air dry, checking them every 30 minutes, until they are no longer damp (but not too dry or they will crack in the cutter).
-
38
You can cut the sheets into noodles of the desired width by hand (see Notes) or using the pasta machines cutting attachments.
-
39
To cut the pasta by hand, start at one of the sheets narrow ends and loosely roll it like a jelly roll, leaving a 1-inch tail.
-
40
With a sharp chefs knife, cut ribbons of the desired width.
-
41
Grab the noodles by the exposed ends, lift them up, and they will unfurl.
-
42
Arrange the noodles on a dish towel or on a surface lightly dusted with semolina.
-
43
Let dry at least 30 minutes before cooking.
-
44
You can make fresh noodles several hours ahead and keep them at cool room temperature.
-
45
You can also freeze fresh pasta with some success.
-
46
Freeze it in a sturdy plastic bag and cook it directly from the freezer; do not thaw first.
-
47
Variations:
-
48
Fresh Saffron Pasta
-
49
You can buy powdered saffron, but I prefer to use saffron threads pounded in a mortar; that way I know Im getting an unadulterated product.
-
50
Enough saffron threads to yield 1/8 teaspoon powdered saffron
-
51
Approximately 2 1/2 cups unbleached all purpose flour
-
52
3 extra large eggs, lightly beaten
-
53
Stir the saffron into the flour, blending well, then proceed according to the directions for Fresh Egg Pasta.
-
54
Fresh Spinach Pasta
-
55
3/4 pound spinach (not baby spinach)
-
56
2 extra large eggs
-
57
Approximately 2 3/4 cups unbleached all purpose flour
-
58
Discard any thick spinach stems.
-
59
Put the spinach in a large pot with just the wash water clinging to the leaves.
-
60
Cover and cook over moderate heat until the spinach wilts.
-
61
Drain and cool under running water, then squeeze to remove as much moisture as possible.
-
62
Put the spinach in a food processor with 1 of the eggs.
-
63
Puree until the spinach is as fine as possible.
-
64
Beat the other egg in a small bowl.
-
65
Put the flour on a large work surface and make a well in the center.
-
66
Put the spinach and the beaten egg in the well.
-
67
Proceed according to the directions for Fresh Egg Pasta.
* Per serving · 4 servings · Values may vary.
Tips for the best results
- Read through all the steps once before you start and measure out your ingredients first — it makes everything go more smoothly.
- Taste as you go and adjust the seasoning before serving.
- Avoid overcrowding the pan — cook in batches if needed for the best texture.
- Let the dish rest for a few minutes before serving so the flavors settle.
- Store leftovers in an airtight container in the fridge and enjoy within a few days.
Variations & substitutions
- A good 1:1 gluten-free flour blend works well if you need a gluten-free version.
No specific allergen information. Please check the ingredient list for possible allergens.
My Personal Notes
Saved locally in your browser — visible only to you.
How did you like this recipe?
Frequently Asked Questions
This recipe makes 4 servings. You can adjust the portion size directly on this page.
You need 2 ingredients. The key ingredients include: Approximately 2 1/2 cups unbleached all purpose flour, 3 extra large eggs, lightly beaten.
Yes, Fresh Egg Pasta falls under the Pasta & Noodles category and is a great choice for this type of meal.
Store leftovers in an airtight container in the refrigerator for up to 3–4 days. Reheat gently before serving.